
If you consider yourself what’s now being called a DIYer, you likely don’t need us to define the acronym for you. If you’re still unsure of exactly what that may be, we’re happy to help you out.
A DIYer, or a “Do-It-Yourself-er” is one that’s not afraid to get hands-on with a little muscle and a lot of creativity, for a home remodel or enhancement project. Even if you’re still new to the life of a DIYer, don’t be afraid of bigger projects like laying tile. Laying a new floor is totally within your scope, and in order to ensure yours ends successfully, you’ll need careful preparation, and an understanding of the steps involved.
Review these steps and you’ll be mentally prepared for the task at hand.
Step 1: Prepare the substrate.
Does the word “substrate” make you want to stop this whole project right this minute? Don’t be intimidated by big contractor words – substrate simply refers to the material that you’ll be laying the tile on. It could be something like existing tile, a mortar base, plywood subflooring or even cement board. Be sure to properly research the proper materials and preparation needed for whatever your laying the tile over.
Step 2: Lay out the pattern
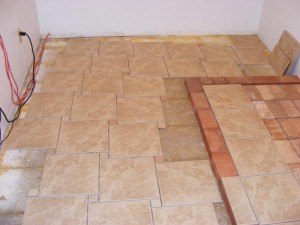
Don’t just start in one corner and start working over to another. Do adequate measurements, draw chalk lines, and even lay out a trial dry run. Once the tiles are laid into place with mastic, it’s difficult to make adjustments. Consider dividing the room into quadrants and then you can begin tiling from the center point using your lines as a guide. This will ensure that your finish points along all walls are similar and leave an overall consistent feel to the finish.
Step 3: Make the cuts
Along the same lines as the previously mentioned and recommended “dry run” consider cutting all your tile in preparation of your project. Tiles can be cut with a manual snap cutter or with a power wet saw. If you’ve calculated and measured the layout of your project space correctly, you can often cut all of the required tiles for row ends and corners before you begin setting the tiles in the mastic.
Step 4: Apply the mastic
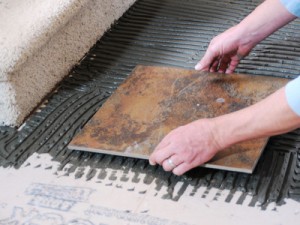
Again, don’t let the word scare you off. Mastic is simply the adhesive that sticks the tile in place on the substrate – or material the tile is being laid on. Use a 1/4 inch notched trowel to spread the adhesive over the floor. Start at your layout lines and press that adhesive against the floor to ensure your tiles will have a good bond. Set the notched trowel on edge and rake the adhesive to create ridges to ensure a proper stick. Be sure your layout lines remain visible so you don’t loose your way. Don’t work outside of an area about 3 to 4 feet square so at to prevent the mastic from drying as you cut and fit the tiles as needed.
Step 5: Lay the tiles
Because you’ve measured and planned properly, you’ll be able to work from the center of your room out toward the walls, therefore, as you work you will not have to step on or disturb any of the tiles you’ve already laid. If you have the option, it helps to have two people when tiling — one to properly lay the tiles and one to hand over the loose tiles, make cuts, or retrieve tools if needed.
Once a tile is set down in place, use a rubber mallet to gently but firmly tap and bed each tile into the mastic. Place plastic spacers to ensure the tiles remain properly laid out without shifting.
Step 6: Grout the joints
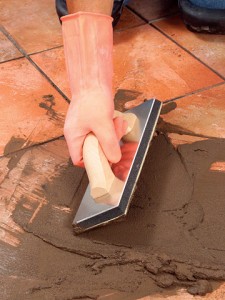
Once your tile is all laid, tapped into place, and spacers are all in the right place, leave the project untouched for at least 24 hours. Whether using premixed grout or grout that has to be mixed in batches, apply the grout to all the cracks in such a way that it completely fills the grooves between each tile. As you work, clean excess grout off the tile faces with a coarse cloth or damp sponge, but be careful not to wet the grout, as water will weaken it.
After the grout has dried thoroughly, scrub the faces of each tile to ensure the grout is removed completely, then apply a grout sealer according to the product directions.
At this point you’ll be flexing your muscles and smiling at yourself in the mirror all while your newly laid tile floor stands strong beneath your weight. You did it. We all knew you could.